Are you tired of fumbling around trying to take screenshots on your Mac or other Apple devices? Fear not, my fellow tech enthusiasts! I’ve got you covered with all the tips and tricks you need to know.
Let’s start with the basics:
How to Take a Screenshot on a Mac
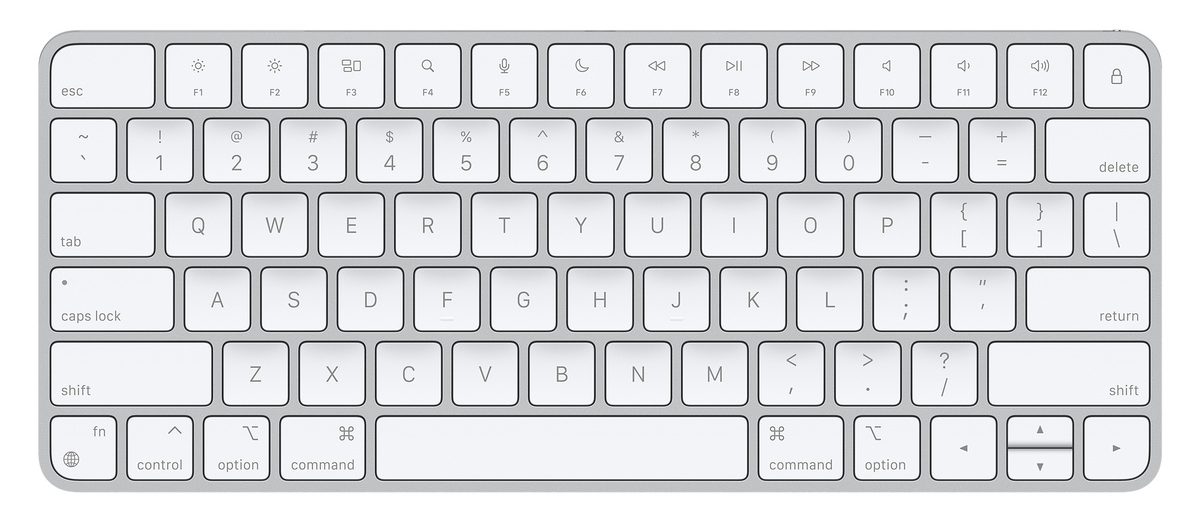
Taking a screenshot on a Mac is actually quite simple. All you have to do is press the “Command + Shift + 3” keys on your keyboard, and voila! Your screenshot will be saved to your desktop.
But what if you only want to capture a portion of your screen? Don’t worry, I’ve got you covered. Simply press “Command + Shift + 4” and your cursor will turn into a crosshair. Click and drag to select the portion of your screen you want to capture, and release. Again, your screenshot will be saved to your desktop.
- Command + Shift + 3: Take a screenshot of the entire screen on a Mac.
- Command + Shift + 4: Take a screenshot of a selected portion of the screen on a Mac.
- Command + Shift + 5: Bring up the screenshot toolbar on a Mac.
- Options: Access additional screenshot options on a Mac.
- Show Floating Thumbnail: Option to enable or disable the thumbnail preview of a screenshot on a Mac.
- Home + Sleep/Wake: Take a screenshot of the entire screen on an iPhone or iPad.
- Side button + Digital crown: Take a screenshot on an Apple Watch.
- Markup tool: A tool that allows annotation of screenshots with text, shapes, and drawings on a Mac.
Now, if you’re like me, you probably take a lot of screenshots. And before you know it, your desktop is cluttered with images. So, how do you keep things organized?

How to Organize Your Screenshots
One way to keep your screenshots organized is by creating a separate folder for them. Simply right-click on your desktop, select “New Folder,” and name it “Screenshots.” Then, whenever you take a screenshot, drag and drop it into that folder. Easy peasy.
But what if you forget to save your screenshot to your desktop or accidentally close it before saving it? Don’t panic! There’s still a way to retrieve it.
How to Retrieve an Unsaved Screenshot
If you’ve taken a screenshot but haven’t saved it yet, you can still retrieve it by using a nifty little trick. Simply press “Command + Shift + 5” to bring up the screenshot toolbar. From there, click on “Options” and make sure “Show Floating Thumbnail” is checked. Now, every time you take a screenshot, a thumbnail will appear in the bottom-right corner of your screen. Click on it to open the screenshot and save it to your desired location.
But what about those of us who use Apple devices other than Macs? How do we take screenshots on those?
How to Take a Screenshot on Other Apple Devices
If you have an iPhone or iPad, taking a screenshot is just as easy as on a Mac. Simply press the “Home + Sleep/Wake” buttons simultaneously, and your screenshot will be saved to your camera roll.
And for those of you with an Apple Watch, taking a screenshot is just a few taps away. First, make sure your Watch app is up to date. Then, go to the screen you want to capture and press both the side button and the digital crown at the same time. Your screenshot will be saved to your camera roll on your iPhone.
Now that you know how to take and organize screenshots on your Apple devices, let’s talk about some tips and tricks to make your screenshots even better.
Tips and Tricks for Better Screenshots
- Use keyboard shortcuts: If you’re taking a lot of screenshots, using keyboard shortcuts will save you time and hassle.
- Use the Markup tool: The Markup tool allows you to annotate your screenshots with text, shapes, and drawings. To access it, simply click on the thumbnail that appears after taking a screenshot.
- Use third-party apps: There are plenty of third-party apps available that can enhance your screenshot-taking experience. Some popular ones include Snagit, Lightshot, and Greenshot.
- Use iCloud: If you have multiple Apple devices, using iCloud to sync your screenshots across them can be a game-changer. Simply go to System Preferences > iCloud > Options, and make sure “Desktop & Documents Folders” is checked.
Now that you’ve got all the tips and tricks for taking and organizing screenshots, it’s time to put them to use! But before you go screenshot-crazy, here are a few more things to keep in mind.
Things to Keep in Mind
- Don’t overdo it: While screenshots can be a useful tool for capturing information, don’t go overboard. Too many screenshots can clutter your device and make it difficult to find what you’re looking for.
- Be mindful of personal information: Make sure to crop out any personal information, such as usernames or passwords, before sharing your screenshots.
- Keep your device updated: Apple devices are constantly receiving updates that can improve performance and add new features. Make sure to keep your device updated to ensure the best possible screenshot-taking experience.
And there you have it, folks! Everything you need to know about taking and using screenshots on your Mac and other Apple devices. With these tips and tricks, you’ll be a screenshot-taking pro in no time. Happy screenshotting!


